Amidst the hustle of urban life, indoor gardening has become a savory retreat for many. It’s not just about beautifying our living space – it’s about reaping the wholesome benefits of nature. With an emphasis on sustainability and health, learning how to grow microgreens is transforming homes into lush sanctuaries of greenery. Whether you reside in a compact apartment or a sprawling estate, urban gardening paves the way for you to cultivate a vibrant harvest right in your nook. Taking the DIY microgreens journey ushers in an era of garden-to-table freshness that’s not only satisfying but also nutritionally stellar.
As grocery bills inflate and yearnings for organic produce intensify, the appeal of homegrown microgreens splurges. What was once an endeavor reserved for the seasoned gardener is now an accessible pursuit, all thanks to microgreens. They grow swiftly, asking for mere inches of space and the simplest of tools. Inviting bursts of life into your residence has never been more straightforward or more rewarding. You’re about to embark on a green-thumb voyage that promises sprouts of joy and plates filled with vitality. Let’s delve into the world of microgreens and turn those leafy dreams into reality.
The Rising Popularity of Indoor Gardening and Microgreens
Amidst the bustling urban landscapes, the allure of cultivating a patch of greenery in the confines of one’s home is charming aspiring gardeners. Urban gardening projects, particularly those geared towards growing microgreens at home, are transforming modern living spaces into vibrant hubs of fresh produce. What appears to be a rise in DIY microgreens projects is actually a revolution rooted in the desire for both wellness and convenience.
Why Growing Microgreens at Home is Gaining Traction
Microgreen seeds have become the cornerstone for a flourishing household activity. Compact and remarkably easy to nurture, these tiny plants are an ideal urban gardening pursuit. The surge in their popularity is a straightforward response to the escalating costs tied to grocery shopping and the yearning for freshness that only home-grown produce can offer. This renewed interest further exemplifies an economical form of indoor gardening that requires minimal intervention.
Nutritional Benefits of Fresh Microgreens
One cannot discuss microgreens without lauding their nutritional prowess. Touted as a powerhouse of essential nutrients, these greens boast high concentrations of dietary fibers, vitamins such as A, C, K, and E, as well as minerals like potassium, iron, and magnesium. The benefits of growing microgreens extend beyond just having a permanent spot on your windowsill; they promise a substantial contribution to the recommended daily intake of vegetables, seamlessly blending health with practicality.
Economical Advantages of Home-Grown Greens
On the financial front, the act of nurturing microgreens comes with frugal perks. Contrary to the outlay on store-bought vegetables, microgreen supplies make for a one-time purchase. A table outlining the cost comparison over time further elucidates this point:
| Expense Category | Store-Bought Greens | Home-Grown Microgreens |
|---|---|---|
| Initial Setup | N/A | Cost of seeds, soil, trays |
| Ongoing Costs | Regular purchasing | Minimal (water, occasional seed restock) |
| Yield | One-time use | Continuous supply |
| Convenience | Subject to availability | Readily available |
It becomes evident that the economical indoor gardening practice not only yields an uninterrupted supply of microgreens but also circumvents the recurring expense of grocery greens, all whilst offering the freshest produce mere steps away from your kitchen.
Microgreens Explained: A Nutrient-Dense Superfood
Microgreens, the young seedlings of vegetables and herbs, have emerged as a powerhouse in the world of health food. Frequently referred to as micro herbs or vegetable confetti, they are not just garnishes on dishes but offer a spectrum of nutrient-dense benefits. Research indicates that microgreens can contain up to 40 times higher levels of vital nutrients compared to their mature counterparts.
Rich in vitamins such as C, E, and K, microgreens are also a trove of potassium, iron, zinc, magnesium, and copper. Beyond their impressive nutrient content, these micro wonders present a multitude of benefits of growing microgreens at home. They support a healthy diet, aid in digestion, and provide a quick and efficient way to enhance the nutritional value of meals. Growing them at home ensures a constant supply of fresh greens that are free from pesticides and long transport times.
Perhaps one of their most significant advantages is how they contribute to disease prevention. The high levels of antioxidants in microgreens help in neutralizing harmful free radicals in the body, which can lead to chronic diseases. As an addition to a weight management plan, their low calorie yet high nutrient balance makes them an ideal food choice.
The cultivation of microgreens is a straightforward venture that can take place year-round, providing a continuous bounty of freshness. Their versatility in the kitchen is unmatched, perfect for adding a punch of flavor and color to soups, salads, sandwiches, and more. For people exploring an introduction to urban gardening, or experienced gardeners looking to add variety to their produce, microgreens are an efficient and fulfilling choice.
As both a culinary and a healthy lifestyle choice, embracing the art of growing microgreens can become a rewarding part of daily living.
Choosing the Right Microgreen Seeds for Your Garden
Embarking on the path to growing microgreens at home can be an exciting and rewarding endeavor. With a few targeted tips and a solid understanding of which varieties to start with, beginners can quickly become adept at nurturing these tiny but mighty plants. Our beginner’s guide to growing microgreens provides essential insights to get you started.
Best Microgreen Varieties for Beginners
Starting your indoor garden with the best microgreen varieties ensures a smoother gardening experience and a more flavorful harvest. For beginners, it is recommended to look for seeds that are not only easy to grow but are also versatile in culinary use. Some of the top choices include:
| Microgreen Variety | Flavor Profile | Growth Difficulty |
|---|---|---|
| Broccoli | Mild, earthy | Easy |
| Kale | Slightly bitter, peppery | Easy |
| Peas | Sweet, fresh | Easy |
| Arugula | Nutty, spicy | Easy |
| Radishes | Crunchy, spicy | Easy |
Where to Source High-Quality Microgreen Seeds
To ensure your microgreen garden thrives, sourcing microgreen seeds of the highest quality is crucial. High-quality seeds lead to better germination rates and healthier plant growth. It is advisable to purchase seeds from well-established distributors or garden centers known for their specialty in microgreen varieties. Reputable suppliers will offer a diverse selection of non-GMO, organic seeds, providing the best foundation for your indoor gardening pursuits.
Whether you are looking to embellish your dishes with fresh greens or aiming for maximum nutritional intake, starting with the right microgreen seeds is a step toward a bountiful and successful harvest.
Essential Supplies to Grow Microgreens at Home
Aspiring gardeners looking to grow microgreens at home need not worry about complex equipment or expensive tools. The beauty of microgreens lies in their simplicity and the minimalistic approach one can take to successfully cultivate them. Starting your indoor garden requires only a few essential microgreen supplies, most of which you might already have or can easily procure.
To embark on this green journey, you’ll require:
- High-quality microgreen seeds, the foundation of your home garden
- An appropriate growing medium or hydroponic mat
- A reliable source of clean drinking water
- Shallow containers or trays designed for plant growth
- A kitchen scale for precise seed measurement or measuring cups
- A misting spray bottle to evenly distribute water
- Pitcher for watering your plants with ease
- A sharp knife or a pair of scissors for harvesting
Moreover, though optional, certain extras could enhance your gardening experience:
- A small colander for effectively rinsing your seeds before planting
- Artificial lighting, especially when sunlight is scarce, to ensure your microgreens receive adequate light
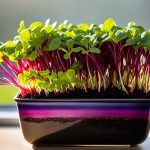
With these supplies, any corner of your home can transform into a burgeoning microgreen oasis. The following image helps budding gardeners visualize the optimal setup for an indoor garden without the need for extensive space or equipment.
The goal is to make the process of growing these nutritious greens as accessible and enjoyable as possible. This way, you not only cultivate healthy additives for your meals but also foster a connection with the food you consume through the rewarding process of growing it yourself. Start with these basics and watch your microgreen garden flourish right in the comfort of your own home.
Setting Up Your Microgreen Growing Space
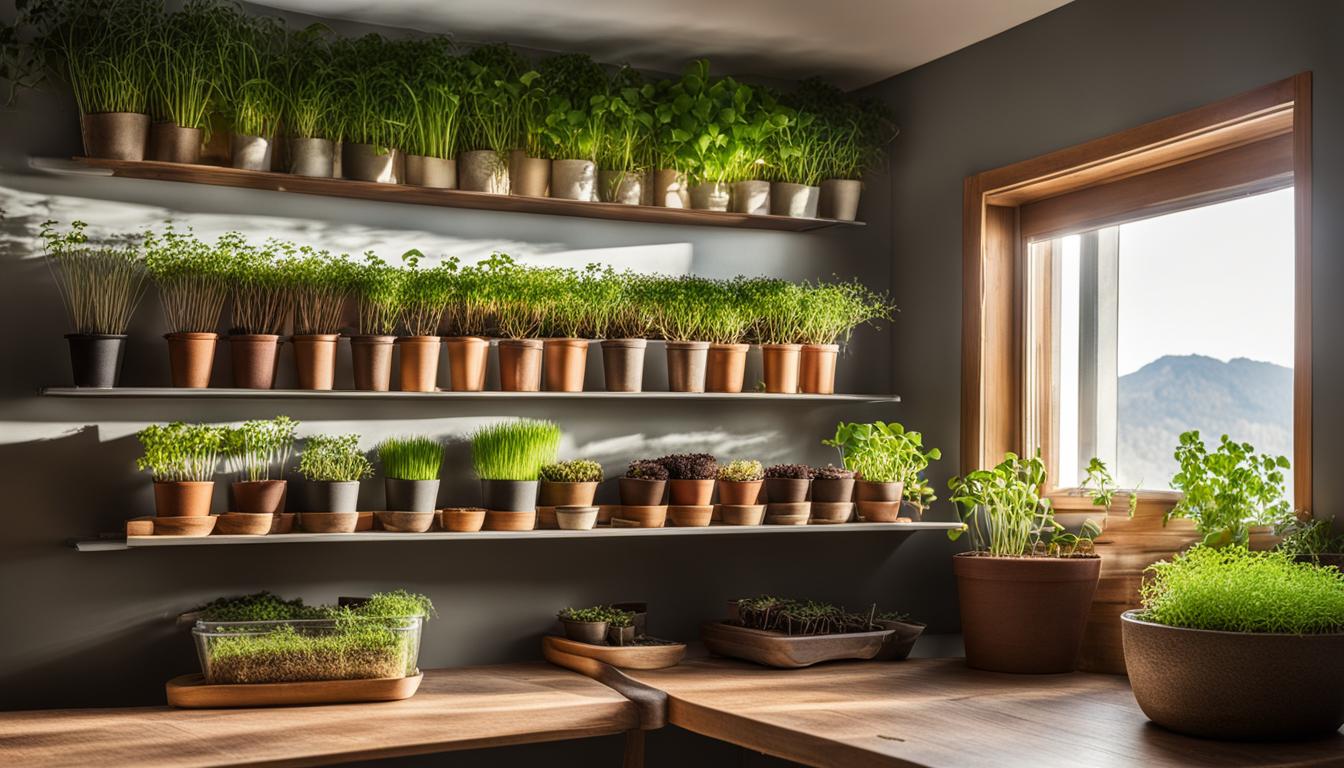
The concept of indoor gardening has never been more apropos than in the bustling, space-conscious world of urban living. Spearheading this green revolution is the trend of cultivating microgreens, a practice that intertwines the joys of gardening with the efficacies of space and resource management. Whether you’re looking to convert a cozy corner into a microgreen growing space or repurpose household items for underfoot farming, this segment aims to guide you through the intricacies of establishing your very own microgreen garden.
Finding the Perfect Location for Light and Temperature
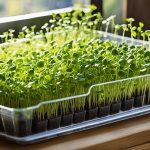
To ensure a thriving microgreen garden, pinpointing the right spot within your home is paramount. Ambient light, its intensity and duration, play a critical role in the chlorophyll production and general vigor of your greens. An ideal locale would be near a southern-facing window, soaking in sunlight to bolster the synthesis of essential nutrients. Moreover, maintaining a stable room temperature can dramatically amplify the quality of your yield, carving out an ideal habitat for these vibrant seedlings.
DIY Solutions for Effective Space Utilization
Challenges presented by cramped quarters call for creative solutions. For the enthusiastic gardener inland, DIY microgreens setups become a revelation. Transforming food packaging, for example, into effective growing trays is a testament to this. Incorporating repurposed materials not only fulfills the role of accommodating your seedlings but also champions the practice of sustainability within urban gardening. The key here is to ensure your newfound containers have proper drainage—a vital measure to prevent waterlogged roots and ensure the success of your indoor garden.
Conclusively, the compact nature of a microgreen garden renders it an exemplary model of space utilization in urban gardening. From selecting a vigorous variety of greens to the creation of conducive micro-environments, channeling your ingenuity can spark the transformation of even the most confined spaces into lush, verdant landscapes. Engage in the artistry of microgreen gardening and watch as your panesill oasis blossoms.
Pre-germination Process: Preparing Seeds for Planting
The journey to lush and vibrant microgreens begins with a crucial step known as the pre-germination process. This preliminary phase is vital for ensuring that your microgreen seeds receive the best start possible. A properly executed pre-germination process supports expedited and even germination, paving the way for a healthier microgreen crop.
Before the seeds make contact with soil or grow medium, they should be pre-soaked, especially those with tougher outer shells. The soaking process often ranges from 8-12 hours, a period that softens the shells and awakens the dormant seed, making it more receptive to germination. After soaking, seeds must be thoroughly rinsed. This step removes potential inhibitors of growth and prepares the seeds for their journey from container to soil. Here’s a simple guide to pre-germination:
| Seed Type | Pre-Soak Time | Water Temperature | Rinsing |
|---|---|---|---|
| Hard-shelled Seeds | 8-12 hours | Room temperature | Yes, thoroughly under running water |
| Soft-shelled Seeds | Not required | N/A | Quick rinse to refresh |
Remember, this is an important step to enhance the germination rate and help your microgreens emerge more uniformly. Once pre-germinated, the seeds are ready for planting, setting the stage for a successful and bountiful microgreen garden. Although the pre-germination process adds an extra step before sowing, it will save time in germination and lead to a robust microgreen yield that is both delicious and nutritious.
Caring for Your Microgreens: Water, Light, and Air Circulation
Caring for microgreens is a delicate but straightforward process. It encompasses three core elements: water management, light management, and air circulation. Each plays a pivotal role in nurturing these tiny yet robust plants to their fullest potential. Focusing on these aspects ensures that your indoor greens thrive, delivering a bountiful harvest of nutrition and flavor. Understanding the nuances of microgreen care can mean the difference between a thriving garden and one that falls short.
To ensure the well-being of your microgreens, it’s crucial to execute consistent water and light management. Here’s a simple guide to streamline the process:
| Aspect | Guidelines | Benefits |
|---|---|---|
| Watering | Utilize the bottom-watering technique by pouring water directly into the tray, allowing roots to absorb moisture as needed. | Prevents mold, promotes strong root growth, and reduces the risk of damaging delicate shoots. |
| Light | Ensure plants receive consistent, gentle light, preferably from LED grow lights or a well-positioned window that offers indirect sunlight. | Encourages even growth and develops rich, green coloration indicative of healthy nutrient levels. |
| Air Circulation | Improve airflow by using a small fan on a low setting or periodically opening windows to allow fresh air exchange. | Reduces the risk of fungal diseases and encourages stronger, more resilient plant structures. |
Remember, too much water can be as detrimental as too little, and the same goes for light. Striking a perfect balance will help you master the art of caring for microgreens. With these guidelines in mind, always be observant of your plants’ responses, as this feedback will guide you in adjusting their care accordingly for optimal growth.
By diligently monitoring these key elements of water and light management, you’ll be well on your way to cultivating a lush microgreen garden. Remember, the beauty lies in the process, and as you familiarize yourself with the needs of these greens, you’ll not only be rewarded by their growth but also by the profound satisfaction that comes with nurturing life from seed to harvest.
The Harvesting Stage: When and How to Harvest Microgreens
Understanding when to harvest your microgreens is key to ensuring their optimum flavor and nutritional value. Typically, microgreens are ready for harvesting once they’ve reached about 1 to 3 inches in height and have developed their first true leaves—these are the leaves that appear after the initial seed leaves or cotyledons. A sure sign your greens are primed for picking is when they are standing tall and the leaves are fully expanded, which usually happens 1-2 weeks after planting, depending on the variety.
The method of harvesting microgreens is just as important as the timing. Utilizing a sharp knife or pair of scissors allows for a clean cut that minimizes harm to the roots and the growing medium. This technique also aids in preserving the remaining plants, should you opt for a staggered harvesting approach. Staged harvesting not only extends the life of your crop but also maintains a continuous supply of these fresh greens. Always ensure that scissors or knives are properly sanitized to prevent any bacterial transfer.
| Microgreen Variety | Typical Harvest Time | Indicator of Harvest Readiness |
|---|---|---|
| Radish | 5-7 days | First true leaves appear |
| Broccoli | 7-14 days | True leaves are dark green |
| Peas | 8-14 days | Tendrils are long and leafy |
| Arugula | 5-10 days | Leaves are rich in color and display serrated edges |
Harvest your greens in the morning when they are most turgid (full of water) for the best texture and crispness. After the act of harvesting microgreens, it is advisable to utilize them as shortly as possible to make the most of their freshness. However, if you must store them, ensure they are dry to reduce the risk of spoilage and keep them in an airtight container in the refrigerator for up to a week.
To maintain a consistent and bountiful crop, consider setting up a rotation of planting and harvesting schedules. This will reward you with a steady supply of microgreens, ready for your culinary creations or health-boosting smoothies. The joy and satisfaction derived from growing and harvesting microgreens at home are, without doubt, matched by the flavorful and wholesome addition they bring to your table.
Maintaining a Continual Harvest of Microgreens
One of the key strategies in microgreen gardening is establishing a cycle for a continual harvest. This process guarantees that you’ll have fresh microgreens ready for your kitchen at all times. It all comes down to succession planting, a technique where you stagger the planting of new seeds to match the harvest time of growing trays. With a little planning, you can keep the cycle going indefinitely.
To implement this, you first need to understand the typical growth cycle of your chosen microgreen varieties. This insight allows you to calculate when to sow new seeds to maintain a non-stop supply. Embrace the routine of planting new trays every week, or even every few days, depending on the growth rate of your greens.
Here’s a basic guide to help you manage your microgreen planting schedule:
| Variety | Germination Period | Growth Time to Harvest | Suggested Planting Interval |
|---|---|---|---|
| Radish | 1-2 days | 5-7 days | Every 3 days |
| Arugula | 2-3 days | 7-10 days | Every 4 days |
| Peas | 2-3 days | 8-12 days | Every 5 days |
| Kale | 3-4 days | 8-12 days | Every 5 days |
By following these cycles, you keep the garden productive while minimizing periods without available microgreens. It’s a harmonious balance of growth, harvest, and renewal that will yield a continual feast of freshness, all from the convenience of your home.
Mastering the art of the continual harvest is a gratifying step in microgreen gardening. It not only speaks to the gardener’s skills but also to the viability of maintaining a consistent home-based food source. Continuous harvest empowers gardeners by providing a self-reliant method for accessing nutritious greens directly from the “farm” to the table.
Grow Microgreens at Home: A Step-by-Step Process
If you’re interested in learning how to grow microgreens, here’s a step-by-step guide that breaks down the essentials for beginners and seasoned gardeners seeking to refine their techniques. This process is a journey through selecting the right seeds, preparing for germination, and nurturing the microgreens to harvest.
Step 1: Begin by selecting high-quality seeds specific for microgreen cultivation. Look for varieties like radishes, kale, and arugula, which are known for their ease of growth and nutritious value.
Step 2: Soak the seeds if necessary, especially those with harder shells. Soaking can range from 4 to 12 hours, depending on the seed type. After soaking, drain and rinse the seeds thoroughly.
Step 3: Prepare your growing medium—this can be soil or a soilless option like coconut coir or felt mats. Place your medium into a shallow tray with proper drainage.
Step 4: Evenly distribute the soaked seeds across the top of the medium. There’s no need to bury them; a gentle press into the surface will suffice.
Step 5: After seeding, lightly mist your seeds with water and cover the tray to create a humid environment, conducive to germination.
Step 6: Once your seeds have germinated and sprouts appear, it’s time to expose them to light. This is crucial for photosynthesis and proper growth. If natural light is scarce, consider using a grow light.
Step 7: Watering is vital, and bottom watering is both favorable and convenient, as it reduces the risk of mold and ensures that the fragile stems are not disturbed.
Step 8: Harvest your microgreens when they have developed their first true leaves, usually between 7 to 14 days after germination, depending on the variety. Use a sharp knife or scissors to cut them above the soil line.
| Phase | Task | Duration / Notes |
|---|---|---|
| Initialization | Select seeds and soak if necessary | Variable, 4-12 hours for soaking |
| Planting | Prepare medium & sow seeds | Day 1 |
| Germination | Cover seeds, maintain moisture | 2-3 days under cover |
| Growth | Expose to light, continue watering | Until first true leaves appear |
| Harvest | Cut and enjoy your microgreens | 7-14 days from germination |
Remember, growing microgreens at home is not just about the end result, but also about the joy and learning that comes with nurturing a living plant from seed to harvest. So, get your hands dirty, and enjoy the green journey!

Conclusion
Embarking on the journey to grow microgreens introduces a dynamic element into your home and lifestyle. By following the easy guide presented in this article, you have uncovered the numerous advantages of indoor gardening, learning exactly how to nurture these small yet mighty plants. The fruits of your labor are now ready to impart substantial nutritional value and a touch of culinary delight to your daily diet.
Reaping the Rewards of Your Microgreen Garden
The process of cultivating your own microgreens culminates in a fulfilling experience that extends beyond the gardening itself. As they flourish under your care, these vibrant greens serve as a testament to the benefits of growing microgreens. Each harvest delivers a burst of health within its tender leaves, contributing to both physical health and emotional satisfaction. Your microgreen garden has become a source of home-grown nutrition that fits perfectly into a sustainable and health-conscious lifestyle.
Incorporating Home-Grown Nutrition into Your Daily Diet
Including microgreens in your daily meals is a simple, yet effective way to enrich the nutritional content of your diet. These versatile greens can easily find their way into an array of dishes, from refreshing salads to hearty sandwiches, and even invigorating smoothies. The act of incorporating microgreens into your diet not only elevates the flavors on your plate but also sustainably supports your health goals with nature’s finest offerings. Home-grown and handpicked, they’re a clear choice for those aspiring towards a balanced approach to eating and living.