Welcome to the verdant world of microgreens, the tiny powerhouses that are rewriting the narrative of urban agriculture. A microgreens setup is not only a space-savvy addition to your abode but also a step towards embracing greener, healthier living. Whether nestled on your kitchen windowsill or claiming a sunny spot in your living room, an indoor microgreens setup enables you to grow lush greens at home with ease.
Join us as we journey through the fundamentals of cultivating these miniature greens and discover how a pinch of seeds and a splash of water can blossom into an endless supply of fresh flavors right at your fingertips. From spicy punches of radish to the soft hues of basil, your culinary world is about to get a whole lot greener.
Understanding Microgreens and Their Indoor Growth Benefits
Making the leap into the world of indoor gardening can be both exciting and nourishing, particularly when you start with microgreens. These tiny but mighty plants are not just a quick crop that you can grow on your kitchen counter; they are a powerhouse of nutrition and ease. Perfect for urban living or for those seeking to add a punch of authentic freshness to their meals, microgreens are an essential element of a modern healthy lifestyle.
What Are Microgreens?
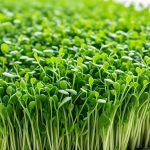
Often dubbed as the seedlings of vegetables and herbs, microgreens are the initial tender greens of plants like kale, arugula, and radish. Consumed after their first leaves develop, these greens are not just a culinary trend but a concentrated source of nutrients. Red cabbage seeds, for instance, can yield microgreens with nutrient levels magnitudes higher than their mature counterparts, offering a substantial dose of vitamins such as vitamin E and vitamin C in just a tiny handful. This aspect makes them an indispensable component for a microgreens growing setup, especially for anyone keen on optimizing their health intake.
Health Benefits of Growing Microgreens Indoors
The health benefits of microgreens are nothing short of impressive. These verdant bits brim with vitamins A, C, E, and K, and are rich in essential minerals and antioxidants. Their intake is speculated to aid in weight management and could contribute to reducing blood pressure levels. Perhaps one of their most exciting components is sulforaphane, an anticancer compound. The ability to grow these healthful plants right in your living space with a DIY microgreens setup means that these health benefits are readily accessible to you, any day, any time.
Why Choose Microgreens for Your Indoor Garden?
When space is limited and you desire a garden that keeps pace with your life, microgreens are a perfect choice. They require minimal room and grow quickly, with a harvest ready in as little as a week. Their compatibility with low-light conditions means that a sunny window ledge is ample real estate for a thriving green space. Opting for the best microgreens setup can lead to not just a rewarding hobby but also a therapeutic retreat within your own home. With microgreens setup tips readily available, even microgreens setup for beginners becomes a delightful foray into self-sufficient living and wellness-conducive pastimes.
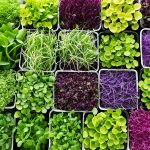
Selecting the Right Microgreen Varieties for Your Indoor Setup
Embarking on your best microgreens setup begins with selecting microgreens that will thrive within the cozy confines of your home. Whether you’re nestled in an apartment with just a whisper of sunlight or you have a home seeped in rays, there’s a variety of microgreens suited for your environment. Let’s explore the vibrant and nutritious world of types of microgreens to grow indoors to ensure your green thumbs yield a bountiful harvest.
For greenery that is as functional as it is flavorful, look no further than broccoli microgreens. These little powerhouses are packed with sulforaphane, a compound commanding attention for its potential cancer-fighting properties. Enthusiasts of diverse textures and tastes can turn to kale or arugula for a peppery pop in salads and sandwiches. Those seeking a burst of sweetness might choose peas, which can also drape your dishes in a delicate, leafy aesthetic.
Meanwhile, microgreens like radish provide a quick and satisfying crunch, perfect for punctuating your plates with a zesty note. For a touch of the Mediterranean, let basil microgreens bless your dishes with their aromatic presence. Each variety not only enhances your food but also brings a spectrum of vitamins and minerals to your table.
It is vital to acknowledge that not all plants are suited for the microgreen stage. Nightshade plants like tomatoes and eggplants harbor harmful toxins that can make their microgreens unsafe for consumption. Distinct from these, sunflower microgreens demand soil for their genesis, presenting a bolder, nutty flavor that belies their dainty appearance. Other microgreens may fare well in more flexible environments, such as growing mats – rendering them perfect candidates for the urban farmer.
When curating your indoors garden, the art of selecting microgreens unfolds as an intimate dance with your own culinary preferences and environmental conditions. Each choice reflects a step towards sustainability, a leap towards self-sufficiency, and a commitment to delighting in the fresh bounty your personal green space provides.
Comprehensive Microgreens Setup Guide
Embarking on your journey to grow microgreens begins with identifying the perfect location. This spot must provide your tiny greens with ample light and a stable environment to thrive. So whether it’s a cozy corner by your kitchen window or a designated space under grow lights, ensure your indoor microgreens setup is poised for success.
Choosing a Suitable Location
For effective preparation for microgreens growing, a location that receives generous light is essential. Whether it’s a naturally sunlit area or an artificially illuminated nook, your setup should have access to steady light without the threat of disruptive temperatures that could impede the growth of your greens.
Gathering Necessary Supplies
Before diving into the particulars of how to set up microgreens, it’s critical to gather your supplies for growing microgreens. Essential items include a selection of high-quality microgreens seeds and a proper seed-starting mix or hydroponic mat. You’ll also need containers such as trays with good drainage or small pots, vermiculite, and a fine-mist watering can. If you can’t rely on natural sunlight, LED grow lamps can also be part of your toolkit.
Preparation of Soil and Containers
The first step in the microgreens setup guide is preparing your growing medium. Opt for a sterile, soilless mix, moistening it with warm water until it has just the right amount of dampness. Distribute this mix carefully into your containers, taking care not to pack it too tightly so that your microgreens’ roots can breathe and drain properly. Remember, proper drainage is integral to your microgreens soil setup; this is where those watertight trays come in handy, capturing excess water and keeping your surfaces clean.
Step-by-Step Process: How to Set Up Microgreens
Embarking on a DIY microgreens setup can be an enriching endeavor, bringing the joys of gardening and the benefits of nutritious greens right into your home. The key to seedling success lies in a few critical steps, often overlooked but vital for that lush, verdant crop. Paying meticulous attention to microgreens soil preparation, seed sowing, and moisture maintenance ensures optimal microgreens growth and bountiful harvests.
Soil Moistening Techniques
To initiate your microgreens growing setup, begin with soil that will foster your little green sprouts. Warm water plays a crucial role in enlivening the germination process; its gentle warmth wakes up the dormant seeds. Pour this life-giving elixir evenly across your chosen seed-starting mix, achieving a state of moistness that’s neither sopping wet nor bone dry—it’s all about balance. This harmonious environment is the first step in a journey that culminates in the sprouting of potential.
Sowing Seeds for Optimal Growth
When it comes time to sow, liberally scatter your microgreen seeds, valuing the dense mat they will create, a literal bed of nutrients. However, wisdom lies in not letting them cluster too tightly; too much company and they will compete unnecessarily. A sprinkle of vermiculite—a mineral that’s like a cozy blanket—keeps them tucked in and moist, fostering germination without the peril of rot. Emulating nature’s gentle touch is paramount, as is heeding the elemental advice found on seed packets regarding proper planting depth.
Maintaining Correct Moisture Levels After Planting
Post-planting, the custodianship of moisture becomes your sacred duty. Gently water your burgeoning seeds, practicing tenderness, and embrace humidity—your nursery of growth requires a microclimate. This delicate jungle can initially be achieved by the simple application of plastic wrap, an incubator for the young. As these fledglings stretch and unfurl, discard their artificial cocoon and place them where the sun’s gentle rays or artificial light can coax them to reach higher. Remember, the savvy wayfarer of microgreens utilizes the bottom-watering method, quenching the seeds’ thirst without drowning their dreams.
Implement these microgreens setup tips, and you’ll find that determined patience and informed actions lay at the core of your gardening pursuit. A bit of care and detailed attention is all it takes to transform tiny seeds into a verdant canopy of nutrient-packed microgreens.
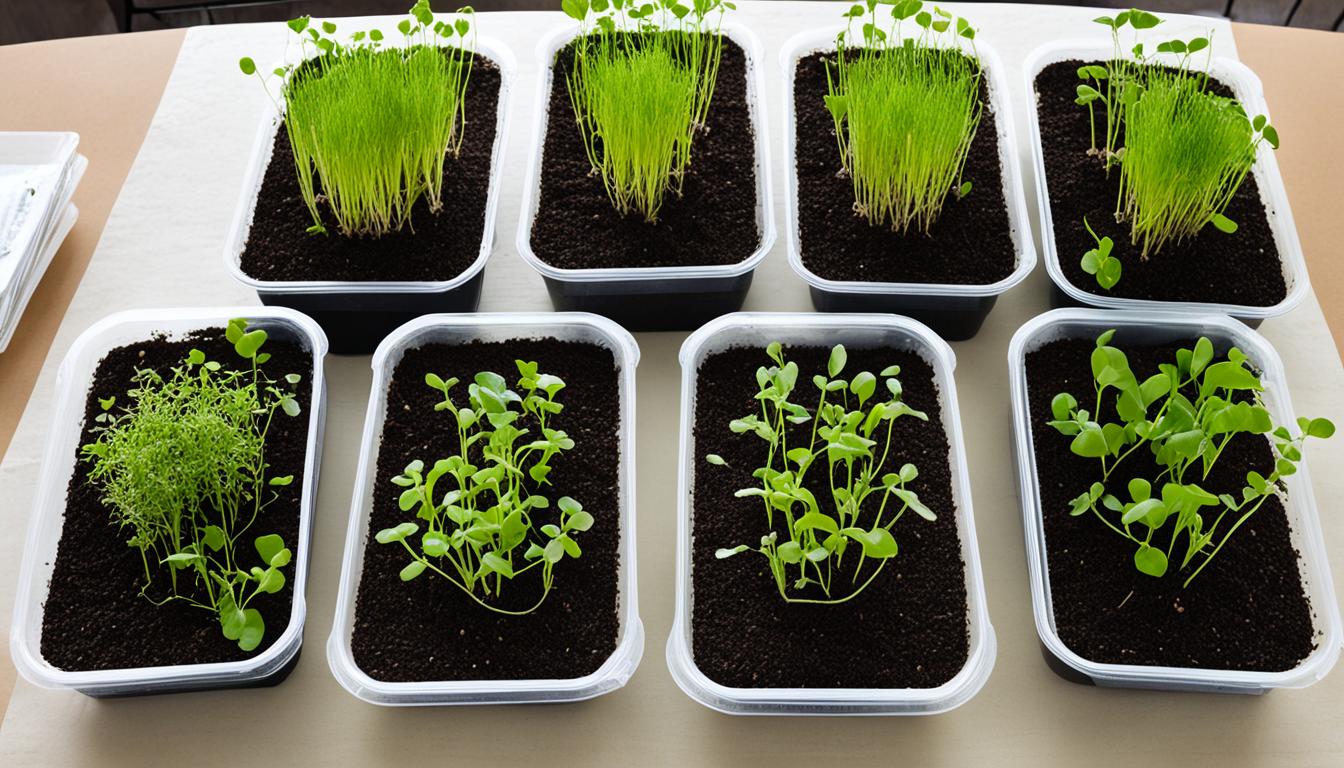
DIY Microgreens Setup Options
Embarking on the journey of creating a microgreens garden at home is an exciting venture filled with the promise of fresh, nutritious greens. Fortunately, a DIY microgreens setup does not require elaborate equipment or significant investment. In fact, some of the most useful materials for your microgreens garden might already be sitting unused in your kitchen or recycling bin.
Clear plastic berry containers, for instance, are excellent for getting started. Not only do they offer cost savings, but they also promote recycling and sustainability. By poking a few holes into the bottom for drainage, these containers become miniature greenhouses that are perfect for microgreen cultivation.
Egg cartons offer another ingenious option for your home setup. These cartons can be filled with soil and seeds, and their compact size makes them ideal for windowsills or other small spaces where light is available. Importantly, recognizing the need for proper drainage is key – a few holes at the bottom and you’re good to grow.
Larger plastic totes can help you scale up your efforts once you’ve honed your green thumb. They’re suitable for those who wish to grow a larger quantity of greens simultaneously, and like smaller containers, can be adapted easily for excellent drainage.
All these options exemplify the versatility and adaptability of DIY microgreens setups. With a touch of creativity and basic household items, it is entirely possible to transform your living space into a thriving microgreens garden. This simple yet effective approach not only embellishes your home with a touch of nature’s green but also serves as a direct resource for enhancing your meals with freshly harvested vitamins and minerals.
As you embark on creating a microgreens garden at home, remember that every big harvest begins with a small seed—a reminder that even the simplest of setups can yield a bounty of these flavorful and nutritious greens. So why not start today? Your DIY setup awaits, promising the joys of gardening and the rewards of healthy eating right in your own home.
Best Practices for Microgreens Watering and Lighting
Fostering a lush bed of microgreens demands meticulous attention to their hydration and lighting needs. Implementing the best practices for microgreens ensures vigorous growth and maximizes the nutritional bounty of these petite greens. Let’s delve into the tried-and-true microgreens watering techniques and discern the critical light requirements for microgreens to ensure your indoor garden flourishes.
Choosing the Right Watering Can
Selecting the right watering can might seem trivial, but it’s crucial for the delicate nature of microgreens. Opt for one that offers a fine spray to gently water the seeds and emerging shoots. This careful approach is pivotal to maintain the right moisture balance, promoting robust root formation and preventing detrimental mold encapsulation. With a proper microgreens setup guide, gardeners can optimize every component, down to the watering apparatus.
Understanding Light Requirements for Microgreens
To photosynthesize efficiently, microgreens crave approximately 4 to 6 hours of sunlight daily. When sunlight is scarce, don’t let your greens languish; choosing suitable microgreens artificial lighting can simulate the solar embrace they need. A setup embracing sufficient lighting is an integral part of the microgreens lifecycle, turning a sprout into a verdant patch ready for your plate.
Artificial Lighting Options for Low Light Areas
If your greens’ haven is shadowed from the sun’s rays, adopting artificial lighting becomes indispensable. LED grow lights are the gardener’s ally, especially in regions where daylight is a coveted guest. These energy-efficient innovations can be customized to various brightness levels, ensuring your microgreens get the right lumens for their dance of growth. When the sun’s attendance is unpredictable, growing microgreens under lights becomes a sustainable and reliable cultivational pivot.
Hydroponic Microgreens Setup Pros and Cons
For the modern indoor gardener, the allure of a hydroponic microgreens setup is strong, thanks to its soil-free cultivation method. This innovative approach relies on alternatives like coconut coir or specialized hydroponic growing mats to support plant growth. Advocates of this system hail its efficiency, noting how it often spurs faster growth rates and mitigates concerns about soil-borne diseases—a significant advantage in producing quality microgreens consistently.
However, transitioning to a soilless environment is not without its challenges and costs. Engaging with a hydroponic system means committing to an upfront investment that can be heftier than traditional soil setups. Costs aside, the pros and cons of hydroponics are also measured through the meticulous attention required in sustaining the perfect balance of nutrients—a task that demands both time and understanding of hydroponic science to ensure the health and vitality of the microgreens.
While the initial cost and learning curve may deter some, the potential for a sterile, controlled growing environment that yields high-quality, nutritious microgreens may temp many to explore hydroponic systems. As we navigate this greener, soil-free frontier, understanding the intricacies and requirements of hydroponic systems will no doubt become a prized skill set among the modern cadre of indoor gardening enthusiasts.
Optimizing Your Microgreens Growing Setup
To enhance your journey in urban farming, focusing on strategically arranging microgreens grow space and employing targeted microgreens setup tips can lead to a considerable increase in your greens’ quality and yield. It’s not just about making the most of your space; it’s about creating an environment where your microgreens can flourish with minimal issues.
Arranging Your Grow Space
The art of maximizing your microgreens yield begins with the thoughtful arrangement of your grow space. To optimize microgreens growth, consider the use of vertical shelving, which not only saves valuable counter or windowsill space but also allows each tray of microgreens ample access to light. Ensure pathways for easy watering and harvesting without disrupting the delicate greens. The key is to create a harmonious space that not only supports the growth of your microgreens but also streamlines your care and maintenance routine.
Troubleshooting Common Microgreens Growing Issues
Even with careful planning, you may encounter challenges that require troubleshooting your microgreens setup. Issues like mold growth and spindly plants often point to too much moisture and insufficient light. To combat these, adjust your watering routines to maintain a balance between hydration and aeration, and consider supplemental lighting if natural light is inadequate. For those facing overcrowding, revisit your seeding technique, ensuring proper seed distribution for optimal growth. By being proactive and attentive, you can prevent these common setbacks from affecting your bountiful microgreens harvest.
Microgreens Setup for Beginners: Avoiding Common Mistakes
Diving into the world of microgreens can be both exciting and a bit daunting for novices. Understanding the basics of a microgreens setup for beginners is critical for anyone looking to venture into this rewarding form of urban agriculture. The key to success lies in sidestepping easily preventable pitfalls and arming oneself with the knowledge to foster a flourishing garden.
Overwatering is perhaps the most common transgression among eager beginners. It’s a misconception that more water equates to faster growth; on the contrary, it can lead to fungal diseases and root rot. An optimal watering regime maintains soil moisture at a level that’s just enough for seeds to germinate and roots to take hold without being waterlogged. Equally important is avoiding microgreens mistakes related to lighting. These pint-sized plants still require sufficient light to photosynthesize, meaning under-lighting will result in spindly and pale shoots.
Moreover, the foundation of a thriving microgreen setup is high-quality seeds. Low-grade seeds not only have a poor germination rate but can also be carriers of pathogens. Stick with reputable suppliers to ensure strong and healthy seedlings. To truly steer clear of beginner’s errors, invest in a detailed guide that covers all aspects of microgreens cultivation, from choosing the right container and growth medium to seed spacing and harvesting techniques.
In summary, while the enthusiasm to jumpstart a microgreens garden is commendable, it’s crucial to proceed with a bit of caution and a lot of preparation. Take the time to learn about proper watering, the significance of adequate lighting, and the importance of quality seeds. Doing so will pave the way for a verdant and productive microgreens setup that’s free from the usual rookie oversights.
Maximizing Harvest: When and How to Harvest Microgreens
The art of harvesting microgreens plays a pivotal role in capturing their peak flavor and nutrient content. Knowing when to harvest can make the difference between a good and a great microgreen experience. Typically, the best time to harvest these tender greens is when they’ve sprouted their first true leaves, which usually occurs between 7 to 14 days after germination, depending on the variety. This timing is critical for preserving freshness of microgreens, as it ensures you’re enjoying them at their nutritional and flavor peak.

The Harvesting Technique That Preserves Freshness
To retain the vibrancy of your microgreens, a gentle clipping method is recommended for harvesting. Carefully grasp small clumps of microgreens and use a sharp pair of scissors to snip them just above the soil line. This technique minimizes damage and subsequent wilting, thus extending microgreens freshness significantly. Immediate refrigeration after harvesting can keep them crisp and fresh for smoother integration into your culinary creations.
Storing Your Microgreens for Extended Freshness
Proper storage is just as important as the harvest itself for extending the life of your microgreen yield. Once snipped, ensure the greens are dry before storing microgreens in the fridge to avoid any excess moisture, which can speed up decay. An airtight container lined with a lightly dampened paper towel will provide the best environment for preservation, safeguarding the delicate leaves from becoming dry while preventing excess moisture from accumulating. With these methods, you can enjoy the rich flavors and nutritional benefits of your homegrown greens for even longer.
Making the Most of Your Indoor Microgreens Setup
With a flourish of verdant colors and a burst of nutrition, microgreens have secured their place as a powerhouse addition to any meal. As a gardener harvesting these tiny greens, you unlock an array of culinary possibilities that not only enrich the taste experience but also infuse dishes with a concentrated dose of health benefits. By incorporating microgreens into meals, you transform even the simplest dish into a vibrant canvas of flavors and nutrients. Let’s delve into the delightful ways to introduce these greens into your diet and share the harvest with your community, amplifying the impact of your indoor gardening efforts.
Incorporating Microgreens into Your Meals
Using microgreens is an art in itself; it allows for imaginative culinary expression that can elevate any dining experience. Sprinkle a handful of peppery arugula microgreens over a pizza for a sharp bite, or blend some kale shoots into a smoothie for a hidden nutrient boost. For a visually appealing garnish, scatter vibrant radish microgreens atop your next entrée. The simple act of incorporating microgreens into meals not only maximizes their fresh, organic essence, but it also infuses your body with their remarkable microgreens benefits.
Sharing the Joy of Growing Microgreens with Others
Sharing microgreens growing extends beyond the confines of personal consumption; it’s an opportunity to bolster community spirit and health. Exchange growing tips with neighbors, gift a portion of your harvest to a friend, or donate to local food pantries. Such acts not only spread the joy and satisfaction of indoor gardening but also help educate on the nutritional importance of these tiny crops. By involving others in the process, you’re not just sharing a product but an experience that inspires and promotes a sustainable, healthy lifestyle.